Seamless Steel Pipe Size and Shape Quality Inspection
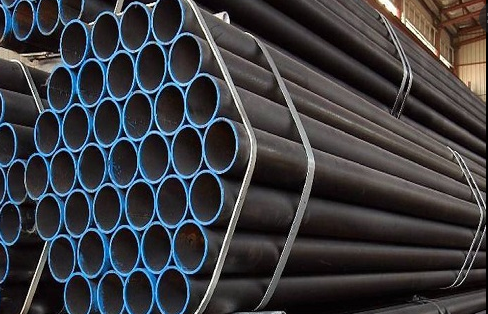
The content of seamless steel pipe & tube size inspection mainly includes: the wall thickness, outer diameter, length, curvature, ovality, end slope and blunt angle of the steel pipe, and the cross-sectional shape of the heterogeneous steel pipe.
(1) Inspection of steel pipe wall thickness
The traditional and commonly used steel pipe wall thickness inspection tool is the wall thickness micrometer. In the inspection room, the wall thickness of the steel pipe is measured one by one with the qualified thousand points. The end face of the steel pipe shall be measured at no less than 8 points, and the unqualified wall thickness shall be marked. The modern seamless steel pipe production unit uses ultrasonic equipment to detect and record the full length of the steel pipe wall thickness.
(2) Inspection of outer diameter and ovality of steel pipe
The tools used to check the outer diameter and ovality of steel pipes are mainly calipers and vernier calipers. During inspection, use a qualified caliper or vernier to measure the outer diameter of the steel pipe one by one. When measuring, the caliper or vernier caliper should be perpendicular to the axis of the steel pipe, and the steel pipe should be slowly rotated to measure the large and small points of the section where the steel pipe is located. When the outer diameter of the steel pipe is found to be too large or too small, a mark should be made. For steel pipes that need to be inspected for pipe end ovality, ring gauges are generally used for inspection. At present, an automatic diameter measuring device can also be used to check the outer diameter of the steel pipe.
(3) Inspection of steel pipe length
The traditional steel pipe length inspection tool is mainly a steel tape measure, which is manually measured. With the development of inspection technology and computer technology, automatic length measuring and weighing devices for steel pipes have been widely used.
(4) Inspection of steel pipe bending
The curvature inspection of the steel pipe includes the inspection of the full length of the steel pipe and the inspection of the curvature per meter. The main tools used are level, feeler and fishing line. When measuring the full-length curvature of the steel pipe, use a fishing line to locate the bowstring of the steel pipe, and tighten the fishing line so that the fishing line is parallel to the axis of the steel pipe and close to the surface of the steel pipe, and then use a feeler gauge to measure the gap between the surface of the steel pipe and the fishing line The large distance, the measured large distance is the full-length curvature of the steel pipe. The measuring tool for bending degree per meter of steel pipe is mainly a level with a length of 1m or not less than 1.83m (for casing pipe end measurement). When measuring, the level should be close to the surface of the steel pipe and ensure that the level is placed The gap distance on the surface of the steel pipe.
(5) Inspection of the bevel angle and blunt edge of the steel pipe end face
The inspection of the bevel angle of the steel pipe end face adopts a square inspection. For the sake of convenience, the first edition of the site uses pipe end bevels and blunt edge pallets to check the bevel angle and blunt edges of the steel pipe end.
(6) Inspection of cross-section shape of special-shaped steel pipe
Special-purpose special-shaped steel pipes require special tools to check their shape parameters due to their different cross-sectional shapes.
Tips: ASTM A106 seamless pressure pipe (also known as ASME SA106 pipe) is commonly used in the construction of oil and gas refineries, power plants, petrochemical plants, boilers, and ships where the piping must transport fluids and gases that exhibit higher temperatures and pressure levels.

